
Piet Van den Eynde is a Belgian photographer and an Adobe Photoshop Lightroom Certified Expert. He also gives workshops on using on- and off-camera flash and postprocessing with Adobe Lightroom, Photoshop and plug-ins such as Nik Software. Recently he took two LaCie drives with him on a trip to India: a Thunderbolt SSD 1TB and a Rugged RAID 4TB.
Below, Piet offers readers advice on…
How To Edit, Sync and Manage Photos Across All Devices with Lightroom and LaCie Rugged.
—
Like most photographers, I have two computers: a laptop and a desktop. Alternately working on both is complicated, since it is not possible to put your Lightroom catalog on a network-attached storage (NAS). If your catalog is stored on your desktop but you want to edit on your laptop, one possible solution is to use Lightroom’s “Import and Export as Catalog” tool. But be aware: this is neither quick nor easy.
This implies exporting your photos as a catalog to an external hard drive, connecting this hard drive to your laptop, opening the exported catalog on the laptop, editing the photos, and then importing the modified catalog back into the main catalog on your desktop. If this sounds complicated, that is because it is. Decidedly something for more advanced users and not something you want to do a few times a day.
Another solution, although again not a favorable one: store your catalog on one or more external drives and connect these to the device you want to work on at that moment. Downside: lugging along a large external drive is not always convenient.
Smart Previews to the rescue!
Smart Previews, introduced in Lightroom 5, provides a solution. It allows you to — once and for all — transfer your Catalog folder (the one with Catalog, Previews and Smart Previews) to a fast-paced external hard drive.
Make sure this drive is as fast as possible — preferably a fast 7,200 RPM hard drive, or a Solid State Drive (SSD) such as the LaCie Thunderbolt SSD I discuss in this article — and that it has a fast interface: USB 3, Thunderbolt or USB-C.
You store your originals on the internal drive of your desktop or on yet another external disk, and plug in the external hard drive with the Smart Previews to the computer you want to work with at that time. On the desktop you work on the originals, on your laptop you work on the Smart Previews.

You can create Smart Previews while importing your photos. To create Smart Previews for your existing photos, select them in the Grid view in the Browser Library module and choose Library > Previews > Create Smart Previews. This might take a while, so you may want to start this process at night and let your computer do an all-nighter.
LaCie Rugged Thunderbolt SSD
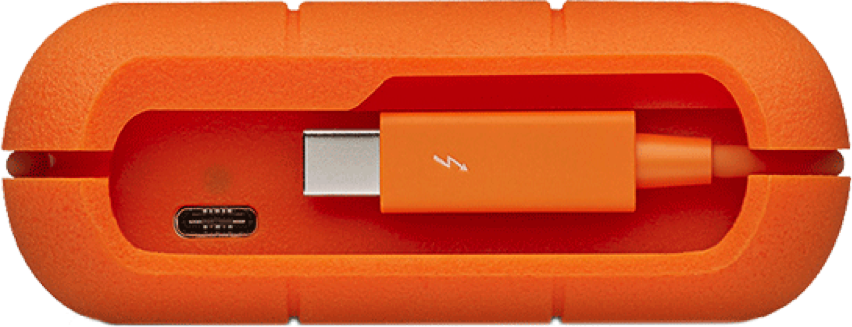
When I went to India with Fujifilm GFX earlier this year, LaCie gave me the opportunity to test the 1TB LaCie Rugged Thunderbolt SSD. I have been using this drive ever since. The LaCie Rugged Thunderbolt are the only drives I know of that have both a USB 3.0 and a Thunderbolt connector. By the way: they also exist in 256 and 512GB SSD versions and in a classic 1 and 2TB rotating disk version.
SSD’s (Solid State Drives) are more expensive, but the prices are dropping steadily and if you only want to store your Catalog and Previews on them, you do not need a large device. And anyway, they are the fastest drives currently available. And in case of the Rugged SSD, your disk is enclosed in a shock absorbing case that also keeps dust and water out — provided you use the covering valve.

To identify what capacity your external hard drive needs to be, go to the File Handling tab of the Catalog Settings after you’ve made your regular and smart previews. Add the Preview Cache size (304GB in my case) to that of the Smart Previews (91GB). In theory this means that I need a 512GB disk for my catalog of 200,000 images. I’ll explain later why I use a 1TB).
It is really convenient that you can wrap the Thunderbolt cable around the drive, so you’ll never forget it. When you have an adapter you can also work with this drive on the latest “USB-C only” laptops. LaCie also has drives, even SSD-drives, that come with a USB-C cable.
If you transfer your Catalog folder to a fast external hard drive you need to be mindful of making a backup. Make it even more rigorous than other backups, because with external drives there is a higher risk of loss and theft (as well as the risk that any drive can get damaged). Make the backup of your Catalog on the desktop’s or laptop’s internal drive (or alternate them) and verify in the backup dialogue screen if Lightroom is backing up to the correct drive!
Working with a “Work-In-Progress” folder on location of during travel
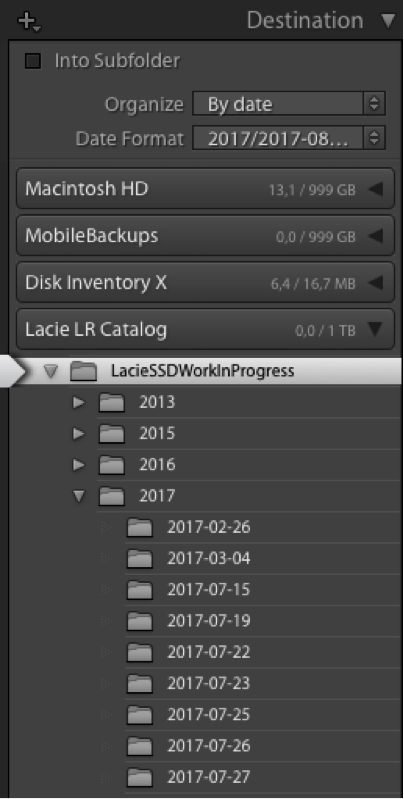
Pro tip: import your most recent photoshoots (on location or during a trip) in a Work-In-Progress folder on your External Catalog Disk. This way you always have your most recent originals with you!
Do not buy an external drive with the exact amount of capacity you need. First of all, your catalog will grow. And your preview folders will expand every time you import new photos. Secondly, a slightly larger drive ensures that you can also work with a “Work In Progress” folder. That’s a folder you create on the drive and to where you import your new work. The advantage is that you always have your latest photos as originals with you, and your older photos as smart pre-impressions. Although you can work with Smart Preview in Lightroom, you might need the original for other applications (such as editing a photo in Photoshop, full-size printing or exporting in hi-res).

The Rugged at work in another rugged location: a deserted cooling tower.
Additionally, you can import photos directly into subfolders of this Work in Progress folder during a shoot on location or on trip. Of course, even in this scenario you need to backup on another drive. When a shoot is finished, you can move the folder from your Work in Progress folder on your external hard drive to the actual disk where you save all your photos — through Lightroom’s folder panel.
LaCie Rugged RAID
I also took the LaCie Rugged RAID 4TB with me to India. This disk is an outlier: it encloses 2TB disks that you can use as one large 4TB disk, as two separate 2TB disks or as a 2TB disk that automatically mirrors the other 2TB disk (the so-called RAID-1 setup).
If you want to safely transport a large batch of original photos, a RuggedRAID can be an alternative to an SSD disk. However, keep in mind that even a RAID-1 setup does not yet provide absolute protection: your drive can still be lost, broken or stolen. You always need at least one additional copy on another physical disk, and ideally two, one of which you do not save at home.
The LaCie Rugged series comes with Thunderbolt as well as with USB-C.